

Never Lose a Note Again — Time Machine Plugin for Obsidian
Obsidian has a built-in File Recovery plugin, but it's pretty basic. I built the Time Machine plugin to fix that. Here's what it does and why you'll want it.

Have you ever accidentally deleted a paragraph you needed? Or spent 20 minutes rewriting something you’d already written before? Or just wanted to go back to an earlier version of a note — but couldn’t?
Yeah. Me too.
That’s exactly why I built the Time Machine plugin for Obsidian.
Video Overview
Obsidian Already Has File Recovery (But It’s Basic)
You might not know this, but Obsidian ships with a file recovery mechanism enabled by the File recovery core plugin for Obsidian. If you haven’t enabled it yet, it’s worth turning on. What it does is simple: it automatically creates snapshots of your notes as you work. Quick win!
To restore previous file versions, you just have to open the Obsidian Command Palette and run “File recovery: Open local history”. You’ll get a list of all the snapshots that exist for the current note, one after another. Click on any of them, and you’ll see a diff: what lines were added, removed, or changed between that version and the current one:
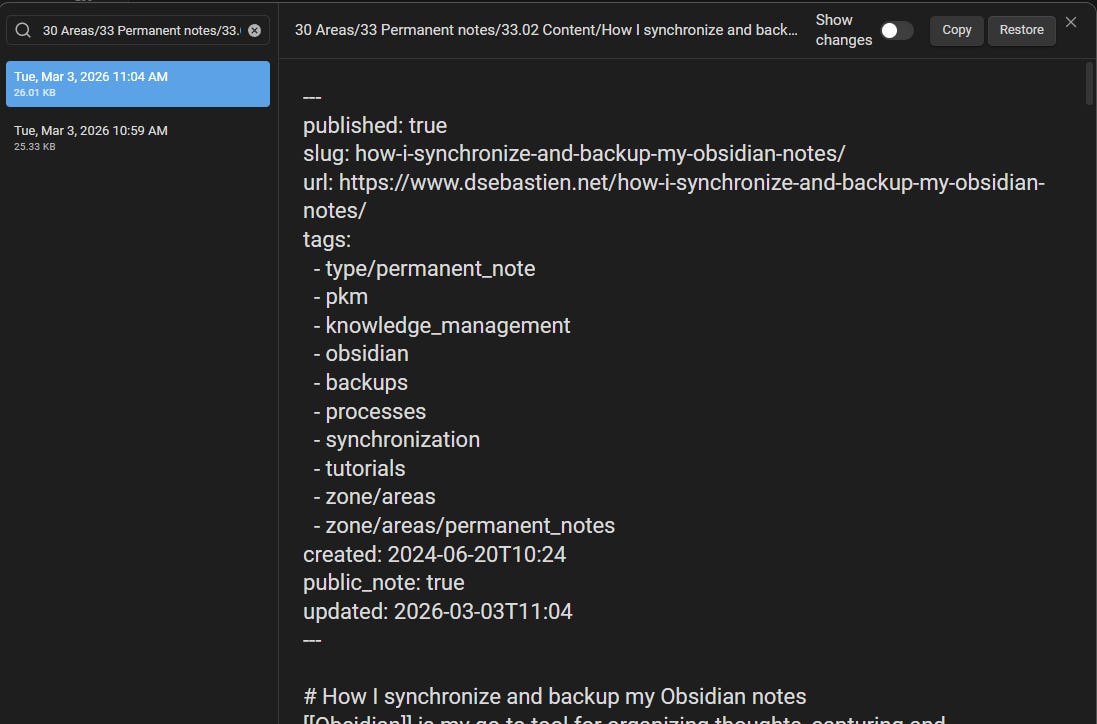
From there, you have two options: copy the content, or restore the snapshot as the current version of the file.
It works. And it’s saved me more than once.
But honestly? It could be better.
The Problem With the Core Plugin
The user interface is functional, but rather limited. You get a flat list of snapshots, and restoring is all-or-nothing. You either roll back the entire file to that point, or you manually copy-paste the bits you need.
That’s a problem. Most of the time, you don’t want to restore an entire note. You want to recover one paragraph, one section, one idea that got lost. The core plugin forces you to do that manually.
And if you’re using Git to version your vault (which I do, and which I strongly recommend, for instance using the Git plugin for Obsidian), there’s no connection at all between your git history and the snapshot history. They’re two separate worlds.
I wanted something better. So I built it.
Introducing the Time Machine Plugin
The Time Machine plugin for Obsidian replaces the core File Recovery UI with something much more user-friendly.
With this plugin, you get the Time Machine view, which looks like this:
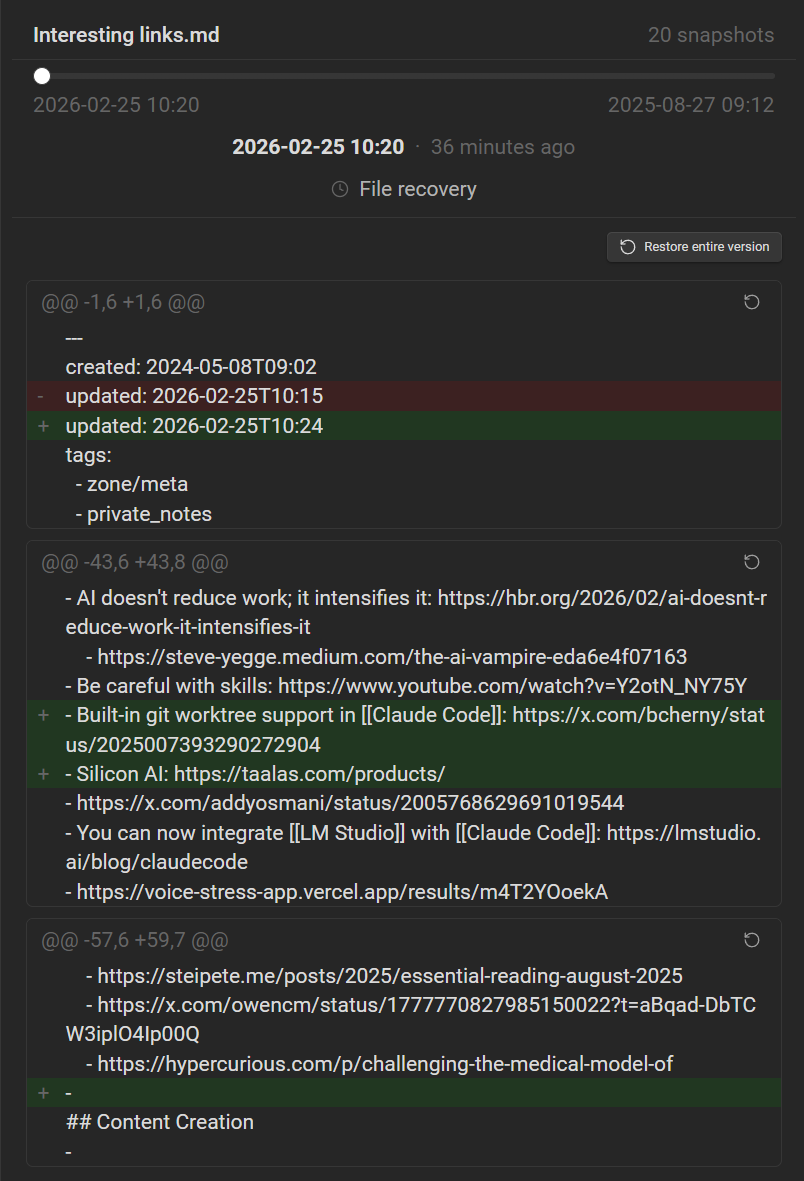
Instead of a flat list, you get a visual timeline with a slider. Past versions of your note are laid out chronologically, and as you navigate through them, you see the diffs in real time. Additions highlighted in green, deletions in red. What changed, what was added, what was removed — all visible at a glance.
The key feature is selective restore. You don’t have to restore the whole snapshot. You can pick specific changes from a given version and apply only those. That’s the thing I was missing most in the core plugin, and it makes a real difference in practice.
The plugin also automatically updates as you switch between notes — no need to manually refresh. It always shows the history for whatever note is currently active.
And you can force the creation of new snapshots easily. Working on something important? Force a snapshot before you make a big change. It’s a small feature, but incredibly useful when you know you’re about to do something you might regret.
Git Integration
If your vault is tracked in a Git repository, the Time Machine plugin merges your commit history directly into the same timeline. So instead of just seeing File Recovery snapshots, you see both — snapshots and git commits. Both combined into one unified, chronological view. Duplicates are automatically removed.
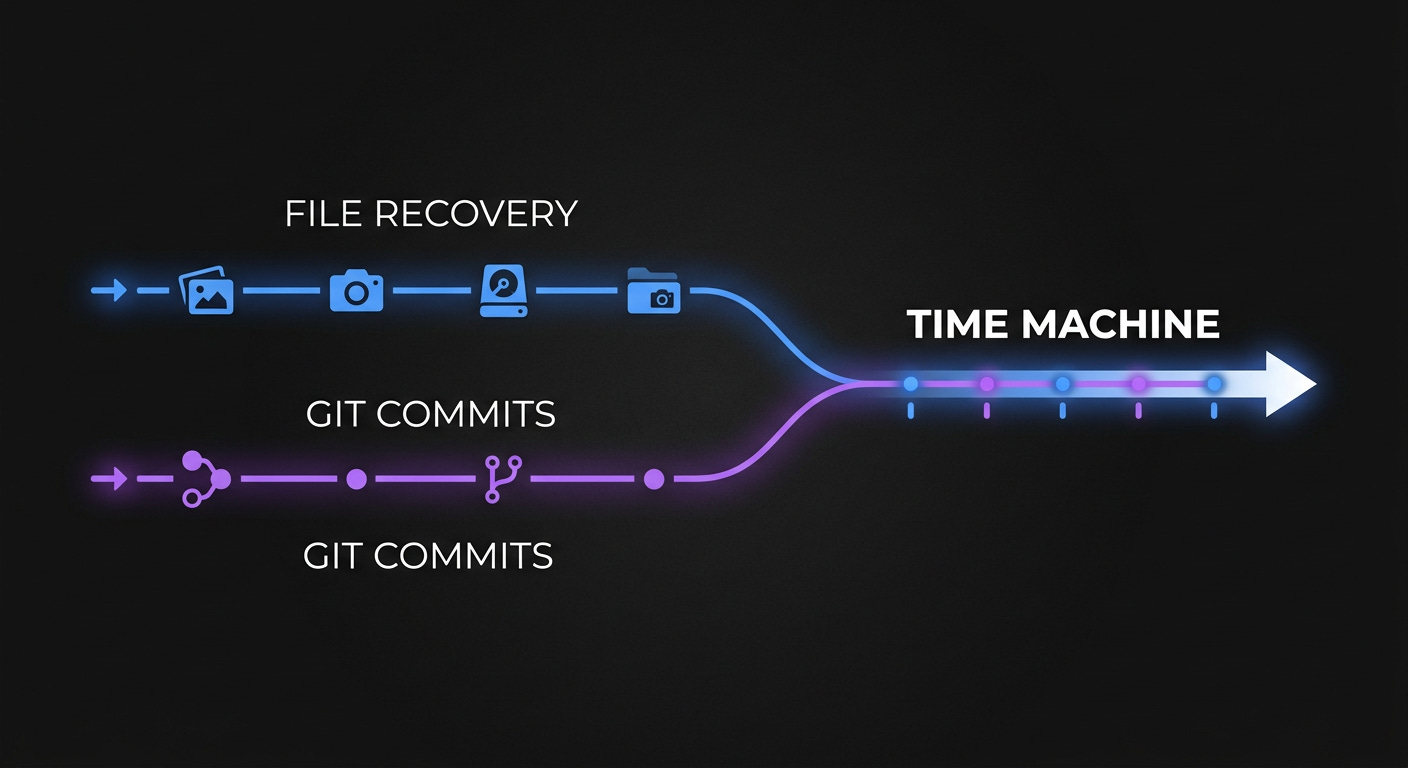
This means you can browse your note’s full history regardless of whether a change was captured by Obsidian’s auto-snapshot or by a manual git commit. Everything is in one place.
If you’re not using git, that’s fine; you still get a better UI for navigating and restoring snapshots. But if you are using git, this unified view is genuinely powerful. I use both in my own workflow, and having them combined has saved me more than once.
Works on Mobile Too
Worth noting: the Time Machine plugin for Obsidian works on both desktop and mobile. The git integration is desktop-only, but the File Recovery timeline and selective restore work everywhere.
How to Install It
First, make sure Obsidian File Recovery is enabled: Settings → Core plugins → File Recovery
Install Time Machine from the Community Plugins browser (Settings → Community plugins → Browse → search “Time Machine”)
If you can’t find it, it means that it wasn’t approved yet. In that case, you can either install it manually, or using the BRAT plugin for Obsidian
Enable it, then open the command palette and run “Time Machine: Open view”
The panel will appear in your sidebar, showing snapshots for whatever note is currently active
That’s it. It’s ready to use immediately.
Should You Use It?
If you care about your notes (you do, right?!), then yes. The Time Machine plugin for Obsidian is a straightforward upgrade over the built-in option.
It’s simple to use, it doesn’t change how you work, and it gives you more control when something goes wrong. Which, at some point, it will.
Keep in mind that the best backup strategy is still a multi-layer one: Obsidian snapshots, git, and a cloud sync. I cover that in detail in this article: https://www.dsebastien.net/how-i-synchronize-and-backup-my-obsidian-notes. Go read it if you haven’t. But for the day-to-day “I need to go back 20 minutes” situation? Time Machine has you covered.
Don’t miss out. Install it and forget about it — until the day you really need it. 🕰️
That’s it for today! ✨
Resources
Documentation: https://developassion.gitbook.io/obsidian-time-machine
Source code: https://github.com/dsebastien/obsidian-time-machine
Video:
Full backup strategy: https://www.dsebastien.net/how-i-synchronize-and-backup-my-obsidian-notes
Free Beginner’s Guide to Obsidian (50+ pages, free): https://www.dsebastien.net/free-beginners-guide-to-mastering-obsidian
Obsidian Starter Kit — my ready-made vault with the best structure, plugins, and templates already set up
If you want to go deeper on Obsidian and Personal Knowledge Management, subscribe to my newsletter. I write every week about note-taking, PKM, and productivity:
👉 https://dsebastien.net/newsletter
And if you want a complete, ready-made Obsidian setup, check out the Obsidian Starter Kit:
👉 https://www.store.dsebastien.net/product/obsidian-starter-kit
Related
About Sébastien
I’m Sébastien Dubois, and I’m on a mission to help knowledge workers escape information overload. After 20+ years in IT and seeing too many brilliant minds drowning in digital chaos, I’ve decided to help people build systems that actually work. Through the Knowii Community, my courses, products & services and my Website/Newsletter, I share practical and battle-tested systems.
I write about Knowledge Work, Personal Knowledge Management, Note-taking, Lifelong Learning, Personal Organization, Productivity, and more. I also craft lovely digital products and tools.
If you want to follow my work, then become a member and join our community.
Ready to get to the next level?
If you’re tired of information overwhelm and ready to build a reliable knowledge system:
🎯 Join Knowii — Complete knowledge transformation system
🛒 Products & Services — Knowledge Management, AI & Knowledge Work
📚 Take the Course — Master Knowledge Management
🚀 Obsidian Starter Kit — Your epic knowledge system
🦉 1-on-1 Coaching — Personalized guidance